
Table of Contents
- How to Manage Office Junk Removal: Planning and Preparation
- Step 1: Estimate the Size and Scope of Your Removal Job
- Step 2: Create an Office Cleanout Checklist and Inventory Items
- Step 3: Sort Items for Keep, Reuse, Donate, Recycle, and Remove
- Step 4: Handle Office Furniture Removal and Equipment Responsibly
- Step 5: Remove Personal Belongings and Confidential Files
- Step 6: Choose Between Commercial Dumpster Rental or Junk Removal Service
- Step 7: Schedule Pickup and Prepare Your Space for Office Downsizing Cleanout
- Frequently Asked Questions
Last Updated: October 17, 2026
How to Manage Office Junk Removal: Planning and Preparation
Planning ahead protects operations, ensures safe handling, and helps you manage office junk removal efficiently.
At Arizona Junk Monkey Removal Services, we’ve helped countless businesses downsize, relocate, and clean out offices. The successful ones inventory what goes, decide what stays, and prepare the space before the team arrives.
This guide covers the steps we recommend to avoid surprises, protect confidential documents, and reclaim space without disruption.
Step 1: Estimate the Size and Scope of Your Removal Job
Before contacting a removal service, walk through your office and assess the volume and types of items to remove.
Ask yourself these questions:
- How many desks, chairs, and filing cabinets are being removed?
- Are there appliances, broken equipment, or electronics?
- Do you have old inventory, cardboard boxes, or office supplies to clear?
The more detailed your inventory, the more accurate your estimate, timing, and cost.
Common items in office cleanouts:
- Office furniture (desks, chairs, cabinets, shelves)
- Electronics and equipment (printers, monitors, old servers)
- Cardboard and packing materials
A small office might need one truck; a large downsizing could need multiple trips. Knowing the difference helps you get an accurate quote and schedule the right resources.
Take photos of the items you want removed. This gives a removal service a clear picture of the job and helps them provide an accurate estimate without a site visit.
Step 2: Create an Office Cleanout Checklist and Inventory Items
A detailed office cleanout checklist keeps you organized and ensures nothing gets missed, especially with multiple people involved.
Your checklist should include:
- Every desk, drawer, and work surface
- Filing cabinets and storage areas
- Break room appliances and furniture
Go through each area systematically, don’t skip drawers, cabinets, or shelves. Small items add up, and forgotten items surface after the team leaves.
Document what’s in each area:
- Type of item (desk, chair, cabinet, equipment)
- Condition (working, broken, damaged)
- Size (small, medium, large)
This inventory becomes your sorting reference and helps you communicate clearly with your removal team.
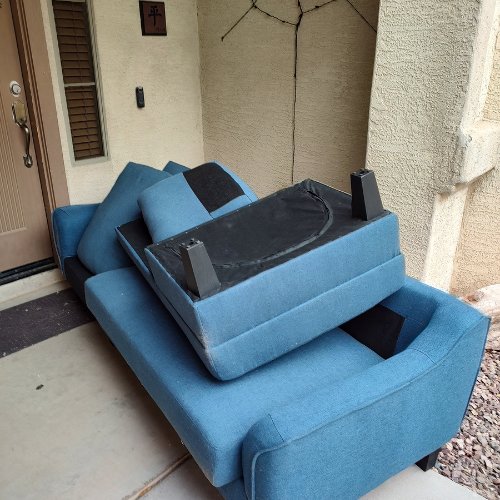
A written checklist prevents items from being forgotten and helps your removal team understand the full scope of the job upfront.
Step 3: Sort Items for Keep, Reuse, Donate, Recycle, and Remove
Sorting forces decisions on every item.
Create five categories:
Keep, Items staying in your office. These go back on shelves, desks, or storage areas after cleanup.
Reuse, Items your business can use elsewhere. A broken chair might work in a warehouse.
Donate, Items in good condition that other organizations can use. Office furniture, working equipment, and supplies often find second lives at nonprofits, schools, or community centers.
Recycle, Items that can be recycled responsibly. Cardboard, paper, metal, and some electronics have recycling programs.
Remove, Items that must be thrown away. Broken equipment, damaged furniture, and contaminated materials go here.
How to actually donate office items
Confirm the item is clean, complete, and working, most centers reject broken furniture, stained upholstery, and missing hardware. Call ahead: many nonprofits have limited pickup windows and specific wish lists. Ask for an itemized donation receipt for your tax records.
Common donation channels for office cleanouts include:
- Furniture banks and community furniture programs that supply homes transitioning out of shelters or disaster recovery.
- School districts and community colleges that accept desks, chairs, shelving, and working computers for classrooms and labs.
- Local nonprofits with thrift stores or office-supply programs, call to confirm what they accept before loading a truck.
Batch donations by destination, one load for the furniture bank, one for the school, one for the thrift store, to reduce fuel and labor and keep receipts organized.
How to recycle office materials responsibly
Recycling office junk means separating materials by stream:
- Cardboard and paper, flatten boxes, remove packing tape and polystyrene foam, and keep paper dry. Most municipal recycling programs accept clean cardboard and mixed office paper.
- Metals, steel filing cabinets, shelving, and desk frames are highly recyclable. Scrap metal recyclers often accept them and may pay by weight.
- Electronics, never place computers, monitors, printers, or servers in regular trash. Use an e-waste recycler that certifies responsible disposal, such as one following the R2 or e-Stewards standard (the EPA). Ask for a certificate of destruction or recycling.
Ask your removal service where items go after pickup. A reputable hauler can tell you which donation partners and recycling facilities it uses and can provide documentation. If they can’t answer, that’s a signal to ask more questions before booking.
The trade-off: time versus cost
Sorting takes labor, half a day for a small office, several days for a large downsizing, but donation and recycling reduce the volume you pay to haul away, and some recyclers pay for metals. Set a deadline per category, assign owners, and move on; ambiguous items can go into a “review” pile before pickup day.
Don’t let “remove” become your default category. Many items can be donated or recycled. Taking time to sort properly saves money and helps your community, but only if you confirm the receiving organization will actually accept the item.
Sorting is not just labeling piles. Confirm donation acceptance, separate recycling streams, and get receipts or certificates so you can prove responsible disposal.
Step 4: Handle Office Furniture Removal and Equipment Responsibly
Office furniture removal requires planning. Desks, chairs, cabinets, and shelving are bulky and heavy. Moving them incorrectly damages property and creates safety risks.
For furniture you’re keeping:
- Clear the path to and from each item
- Protect floors with blankets or cardboard
- Remove drawers from cabinets to reduce weight
For furniture being removed:
- Stack items safely to maximize truck space
- Keep similar items together (all chairs in one area, all desks in another)
- Don’t block access routes while staging items for pickup
Office equipment like printers, monitors, and servers needs careful handling, electronics require proper disposal, never regular trash.
Many removal services handle furniture removal safely without damaging walls, floors, or doorways. If managing this yourself, take your time and use proper lifting techniques.
Step 5: Remove Personal Belongings and Confidential Files
This step protects your business and employees. Before any removal, all personal items and confidential documents must be removed. “Shred sensitive papers” isn’t enough, you need a documented chain of custody for paper and digital data, with electronics handled as a separate compliance stream.
Personal belongings to retrieve:
- Items from desks and drawers
- Personal photos and decorations
- Employee personal property
Confidential documents and files:
- Financial records
- Personnel files
- Client information
Secure document destruction: paper
Confidential paper should never go into a dumpster or removal truck. Use one of these approaches:
- On-site shredding, a mobile shredding truck comes to your office, shreds in front of a witness, and provides a certificate of destruction. This is the strongest chain-of-custody option because documents never leave your control unshredded.
- Off-site shredding with locked collection, you fill locked consoles, a bonded carrier transports them, and you receive a certificate of destruction after shredding. Confirm the carrier’s background-check and chain-of-custody policies.
- Desktop shredders, acceptable for low-volume, low-sensitivity paper, but not for personnel files, financial records, or client data. Cross-cut or micro-cut shredders are preferable to strip-cut.
Whichever route you choose, get a certificate of destruction listing the date, volume, and method, and store it with your records. If a data incident is later alleged, that certificate is your evidence documents were destroyed before removal.
Data wiping and electronics disposal
Computers, servers, printers, copiers, and multifunction devices store data, often more than people expect, since copiers and printers may retain scanned images on internal hard drives. Treat every device with storage as a data-bearing asset.
Before disposal or removal:
- Inventory every device, tag computers, laptops, servers, external drives, printers, copiers, and any equipment with a hard drive or flash storage.
- Back up needed data, confirm files are copied to your server or cloud before wiping.
- Wipe or remove storage, use a certified data destruction method. For drives that will be reused, overwrite according to a recognized standard. For drives leaving your control, physical destruction (shredding or degaussing) is the safest option.
- Get a certificate of destruction, a reputable IT asset disposition (ITAD) vendor or e-waste recycler will provide one listing serial numbers and destruction method.
- Recycle the device, use an e-waste recycler that follows a recognized certification such as R2 or e-Stewards. Never place electronics in regular trash; many states restrict or ban electronic waste in landfills.
Leaving confidential files in furniture or cabinets creates serious liability. Remove all sensitive documents before scheduling pickup. One overlooked file, or one un-wiped copier hard drive, could expose your business to data breaches or regulatory violations.
A practical sequence for the week before pickup
- Day 1-2: Employees clear personal belongings and place confidential paper in locked shred consoles.
- Day 3: IT inventories and wipes or removes storage from all devices; schedule on-site shredding if using that route.
- Day 4: Collect certificates of destruction for paper and electronics; confirm donation and recycling destinations.
Paper and data need separate, documented destruction paths. Get certificates of destruction for both, and treat every printer, copier, and computer as a data-bearing device.
Step 6: Choose Between Commercial Dumpster Rental or Junk Removal Service
You have two main options for handling office junk removal: renting a dumpster or hiring a junk removal service. Each has advantages depending on your situation.
Commercial Dumpster Rental:
- You load items yourself over several days
- Fixed rental period (usually 1-2 weeks)
- Good for large projects with time to load gradually
Junk Removal Service:
- Professional team loads everything in one visit
- Faster process, minimal disruption to operations
- No need for on-site dumpster storage
For most office cleanouts, a junk removal service is more efficient: your team focuses on business operations while professionals handle the heavy work.
The choice depends on your timeline, budget, and labor. For speed with minimal disruption, a removal service saves time and effort; if you have flexibility and want to manage costs, a dumpster rental gives you control over timing.
Businesses needing quick office cleanouts with minimal disruption to daily operations. Professional removal teams handle the heavy lifting and logistics in a single visit.
Step 7: Schedule Pickup and Prepare Your Space for Office Downsizing Cleanout
Once you’ve sorted items and chosen a removal method, schedule pickup for a date and time that minimizes disruption.
Scheduling considerations:
- Avoid peak business hours
- Choose a day when staff can help if needed
- Allow enough time to complete the job without rushing
Before the removal team arrives:
- Ensure all personal items are removed
- Clear confidential documents and electronics
- Create a clear path to all items being removed
On pickup day:
- Be present to answer questions about specific items
- Point out anything that requires special handling
- Confirm which items are being removed versus staying
After the team leaves, do a final walkthrough to confirm all intended items are gone and nothing was accidentally removed. Check corners, closets, and storage areas, cleanouts often leave behind small items.
Office junk removal doesn’t have to be stressful when you plan ahead and follow a clear process. Arizona Junk Monkey Removal Services handles office furniture removal, appliance removal, and responsible disposal for businesses across the Northwest Valley and beyond.
Frequently Asked Questions
How far in advance should you schedule office junk removal?
Schedule office junk removal at least 1-2 weeks ahead to allow time for inventory, sorting, and preparation. If you’re managing an office downsizing cleanout or post-eviction property cleanup, plan 2-3 weeks in advance. This advance planning gives your team time to remove personal belongings, handle confidential documents, and clear a safe path to items and building exits. Scheduling early also ensures you get your preferred pickup date and time that minimizes work disruption to business operations.
What should be on an office cleanout checklist?
Your office cleanout checklist should include: desks, chairs, filing cabinets, shelves, and other office furniture; desk compartments, drawers, and storage units; personal belongings and private files; office supplies and cardboard boxes; appliances and electronic waste; items to keep, reuse, or donate. Do an item-by-item inspection of each work area. Document the condition of office furniture and note anything that requires special handling. This checklist helps you estimate the job size and communicate clearly with your removal team about what needs to go.
How do you handle confidential documents during office junk removal?
Before scheduling pickup, remove all personal belongings and confidential files from desks, drawers, and cabinets. Use a document shredder or hire a professional shredding service to destroy sensitive records. Do not leave private files in furniture being removed. For electronic waste like old computers or hard drives, use certified e-waste disposal to protect data. This step is critical for protecting your business and employees, and it must happen before your removal team arrives.
Should we rent a commercial dumpster or hire a junk removal service for office furniture?
Choose a commercial dumpster rental if you have a large volume of items, a longer project timeline, or ongoing disposal needs. Choose a junk removal service if you need fast, one-time pickup with responsible disposal and donation options. A junk removal service handles heavy lifting, sorting, and ensures items are disposed of, recycled, or donated properly. For office furniture removal specifically, a professional service often saves time and guarantees safe handling of large pieces like desks and filing cabinets.